


Views: 0 Author: Site Editor Publish Time: 2026-09-07 Origin: Site


The profitability of CNC operations is often won or lost during the setup phase. Even the most advanced equipment cannot compensate for poor workpiece securing. A flawless setup guarantees accurate cuts, protects your expensive spindle, and prevents unexpected project failures. For buyers evaluating a 3-axis engraving machine, understanding the operational workflow remains critical. You need this knowledge to accurately project labor overhead, cycle times, and scrap rates. Errors made at the machine bed multiply rapidly across large production runs. This guide breaks down the technical setup process, workholding evaluation criteria, and implementation risks. We aim to help production managers and buyers make informed equipment decisions. You will learn how to lock down your workflow, mitigate operator errors, and maximize daily precision.
A high-speed spindle turning at 24,000 RPM creates value only while cutting material. Setup complexity directly affects actual machining time. Complex fixturing increases operator touch-time. This extra handling reduces your daily output significantly. If operators spend twenty minutes clamping a single panel, you lose precious spindle uptime. Shop managers must optimize setup workflows to keep overhead costs low. Every minute saved during part loading translates into higher daily throughput.
Repeatability in production runs serves as another major factor. Reliable setups allow you to utilize dedicated fixture plates and mechanical stops. These tools enable low-skill operators to load and unload parts rapidly. They can achieve this speed while maintaining zero loss in dimensional tolerance. Establishing a repeatable zero-point means your team does not need to probe every single blank. You load the stock, press start, and trust the outcome.
Finally, consider material waste and your scrap rate. Poorly secured stock frequently causes tool chatter. In worst-case scenarios, the spindle ejects the part entirely. We view poor setups as a direct hit to the bottom line. This financial loss hurts even more when machining expensive stock like aerospace aluminum or exotic hardwoods. A precise setup protects your material investment and ensures a pristine surface finish.
Choosing the correct workholding method dictates the success of your routing process. The wrong clamp can obstruct the cutting tool or warp the material. We must match the securing strategy to the specific geometry and rigidity of the workpiece.
Mechanical clamps provide robust holding power for thick stock. They work best for general-purpose routing and one-off parts. Operators slide bolts through a T-slot bed to secure step blocks and toe clamps. While inexpensive and highly adaptable, this method carries limitations. Clamps introduce severe risks for tool collisions. Programmers require careful toolpath planning to avoid hitting the steel hardware. Operators must also monitor clamp pressure to prevent crushing softer materials.
Vacuum hold-down systems excel at securing flat-sheet goods and facilitating high-volume production. They represent the ideal choice when operating as a relief carving machine for wide, expansive panels. A strong vacuum pulls the material flat against the spoilboard, eliminating bows. The business case for vacuum tables remains strong despite a higher upfront capital cost. This technology drastically reduces per-part loading time. Operators simply drop the sheet onto the zoned bed and open a valve.
Certain projects involve small, brittle, or irregularly shaped materials. These jobs demand specialty fixtures like adhesives, machinable wax, or low-profile vises. These techniques prove essential for a CNC jade carving machine. Traditional mechanical clamping would easily fracture the delicate stone. Similarly, when running a jewelry 3D engraving machine, bulky clamps block the fine micro-bits from reaching the workpiece. Cyanoacrylate glue paired with painters tape offers a low-profile, high-strength bond for these sensitive applications.
| Strategy | Best Applications | Primary Advantage | Main Limitation |
|---|---|---|---|
| T-Slot & Clamps | Thick stock, general routing, one-off parts | Low cost, highly adaptable to shapes | High risk of tool collision, slow setup |
| Vacuum Tables | Flat sheets, large wooden panels, high volume | Instant loading, unobstructed toolpaths | High initial cost, ineffective on porous stock |
| Specialty Fixtures | Jade, jewelry, brittle composites, tiny parts | Zero clamping distortion, full part access | Consumable costs, requires careful surface prep |
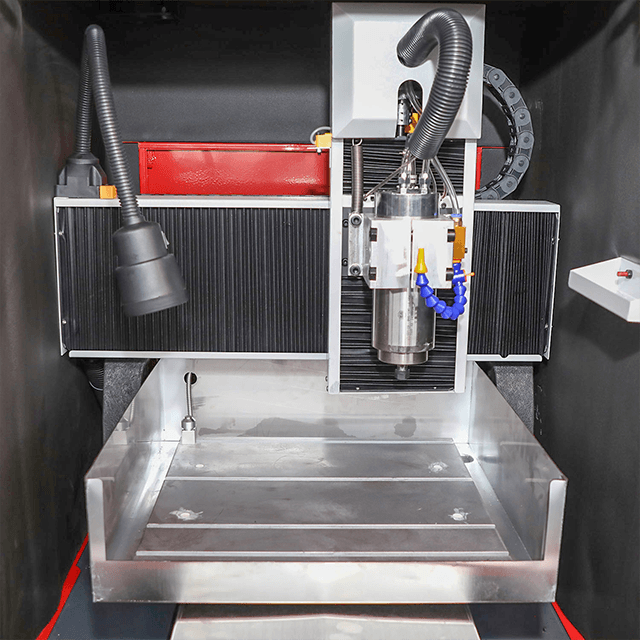
Executing a standardized setup procedure separates amateur shops from professional production environments. Following a strict sequence guarantees precision and prevents costly machine crashes. We recommend implementing this proven four-step workflow.
Understanding the capability envelope of your equipment prevents project delays and wasted capital. Standard machines excel at 2.5D cutting and top-down 3D relief carving. They perform beautifully when the cutting tool does not need to undercut the material. However, complex geometries often expose setup limitations.
A standard configuration moves simultaneously across X, Y, and Z planes. The cutting bit always points directly downward. You can carve deep topographic maps, intricate signage, and flat mechanical parts effortlessly. However, if a part requires machining on its side or bottom, the operator must manually pause the machine, unclamp the part, flip it, and re-zero the coordinates. Every manual flip introduces tolerance stacking errors. Minor misalignments multiply, ruining tight-tolerance components.
You do not always need to buy a completely new machine for cylindrical parts. Adding a 4th-axis rotary module to a standard board allows for cylindrical setup. This module grips items like table legs, pool cues, or rings. It rotates the stock continuously while the spindle carves from above. This upgrade bridges the gap. It grants multi-sided access without forcing you to fully upgrade to a much more expensive true 4-axis or 5-axis mill.
Use clear guidelines when evaluating your equipment needs based on setup times:
Even a perfectly chosen workholding strategy carries implementation risks. We see operators make predictable errors that ruin parts and damage equipment. You can avoid these pitfalls by standardizing your shop procedures.
Risk: A fatal error occurs when coordinate systems mismatch. The operator might set the physical Z-zero to the machine bed. However, the CAM software programmer placed the Z-zero at the top of the raw stock. When the cycle begins, the spindle plunges rapidly into the table, shattering the tool and damaging the spindle bearings.
Solution: Standardize your shop operating procedures (SOPs). Mandate a universal origin point rule for all programmers and operators. Post visual checklists at the controller station to force verification before hitting cycle start.
Risk: Inadequate workholding on thin or flexible materials causes vibration. The material flutters under cutting forces. This chatter leaves ugly ripples on the surface. It completely ruins the surface finish on delicate projects, requiring hours of manual sanding.
Solution: Implement rigid masking techniques. Apply painters tape to both the bed and the part, then bond them using cyanoacrylate (superglue). This trick holds thin stock completely flat. For larger production runs, deploy localized vacuum pods to grip the part exactly where the tool cuts.
Risk: Hard materials generate significant heat during long carving cycles. Materials like jade, brass, and aluminum expand as temperatures rise. If the carving cycle lasts hours, this thermal expansion causes the setup to shift slightly against rigid clamps. The resulting toolpaths will drift, causing dimensional inaccuracies.
Solution: Ensure your setup accommodates adequate cooling. Use flood coolant or mist systems to stabilize part temperatures. Furthermore, use temperature-stable clamping materials and avoid over-tightening vises, allowing microscopic room for thermal growth.
Effective workpiece setup balances iron-clad workholding security with rapid changeover times. A rigid, accurately zeroed setup eliminates chatter, prevents tool collisions, and ensures your finished parts match the CAD design perfectly. Every step, from surfacing the spoilboard to dry-running the bounding box, protects your spindle investment and reduces costly scrap.
Before making a final machinery purchase, we encourage buyers to audit their typical part geometries and material types. Determine whether your workflow demands the versatility of T-slots, the speed of a vacuum table, or the specialized grip of custom fixtures. Carefully evaluate whether standard setups meet your needs, or if add-ons like rotary attachments make business sense.
To lock in the right decision, consult with application engineers. Ask them to test-cut your specific material using different workholding methods. Review the technical spec sheets carefully for accessory compatibility, ensuring your chosen machine can adapt to your future production demands.
A: It depends on your production volume and material. Vacuum tables offer a massive ROI for high-volume shops cutting large, flat, non-porous sheets like MDF or acrylic. They drastically reduce loading times. For occasional routing, small parts, or highly porous materials, standard T-slot clamping remains more cost-effective.
A: The most accurate method involves an auto-tool zero sensor, commonly called a touch block. You place the conductive block on the material surface. The spindle lowers slowly until the bit completes a circuit by touching the block. The controller automatically sets the precise Z-zero offset.
A: Yes, provided you add a rotary attachment. This module typically plugs into a dedicated 4th-axis driver on the controller board. It utilizes a chuck and tailstock setup to rotate cylindrical objects, allowing the spindle to carve 360 degrees around table legs, rings, or pens.
A: Avoid traditional mechanical clamps, which cause stress fractures. The best method involves non-marring techniques like machinable wax mounting, specialized cyanoacrylate adhesive setups, or using custom-machined soft jaws. These methods hold brittle stone securely from the bottom without pinching the delicate edges.


